
Mitered Squares Throw With a Fabric Lining
March 3, 2014
This is one of my favorite projects ever. This pattern has been around for a while and I was late to the game on it. It is the Mitered Crosses Blanket that Kay Gardiner made for Japan tsunami relief a couple of years ago. There are over 900 project pages for it on Ravelry. I loved this pattern so much and really loved making it. One of the best things about this pattern is that the project, up until the time that you assemble all the blocks, is very portable. I took these squares everywhere with we while I worked on them.
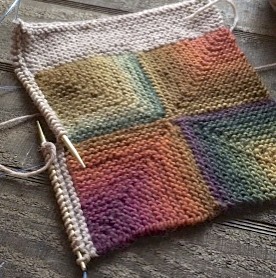
I changed quite a few things from the original pattern, though. The original called for mitered crosses, of course. I decided I didn’t want to do the crosses and did squares instead. I really like the way they turned out. The squares are super easy to make and after a short time, you don’t even need the pattern. There’s no counting of rows – yay! – you just have to remember to do the decreases on the right side and none on the wrong side. Just make sure you have a stitch marker to mark your corner, where you do your decreases.

I also did not use Noro Silk Garden for two reasons: I feel it’s a little scratchy and it’s very expensive. So I searched and found a striping yarn that substituted very nicely – Crystal Palace Mochi Plus. The colors in Mochi Plus were stunning and it was a hard decision on what colorway to use. I loved Lake Trail and Leaves & Sprouts but eventually settled on Autumn Rainbow because I started this in the fall and the yarn exactly matched the colors I was seeing all around me. The yarn stripes slowly, which I really liked for this. It is a one-ply yarn so it could be a little felty. For the background color, I used Cascade Yarns 220 Heathers in Doeskin Heather.

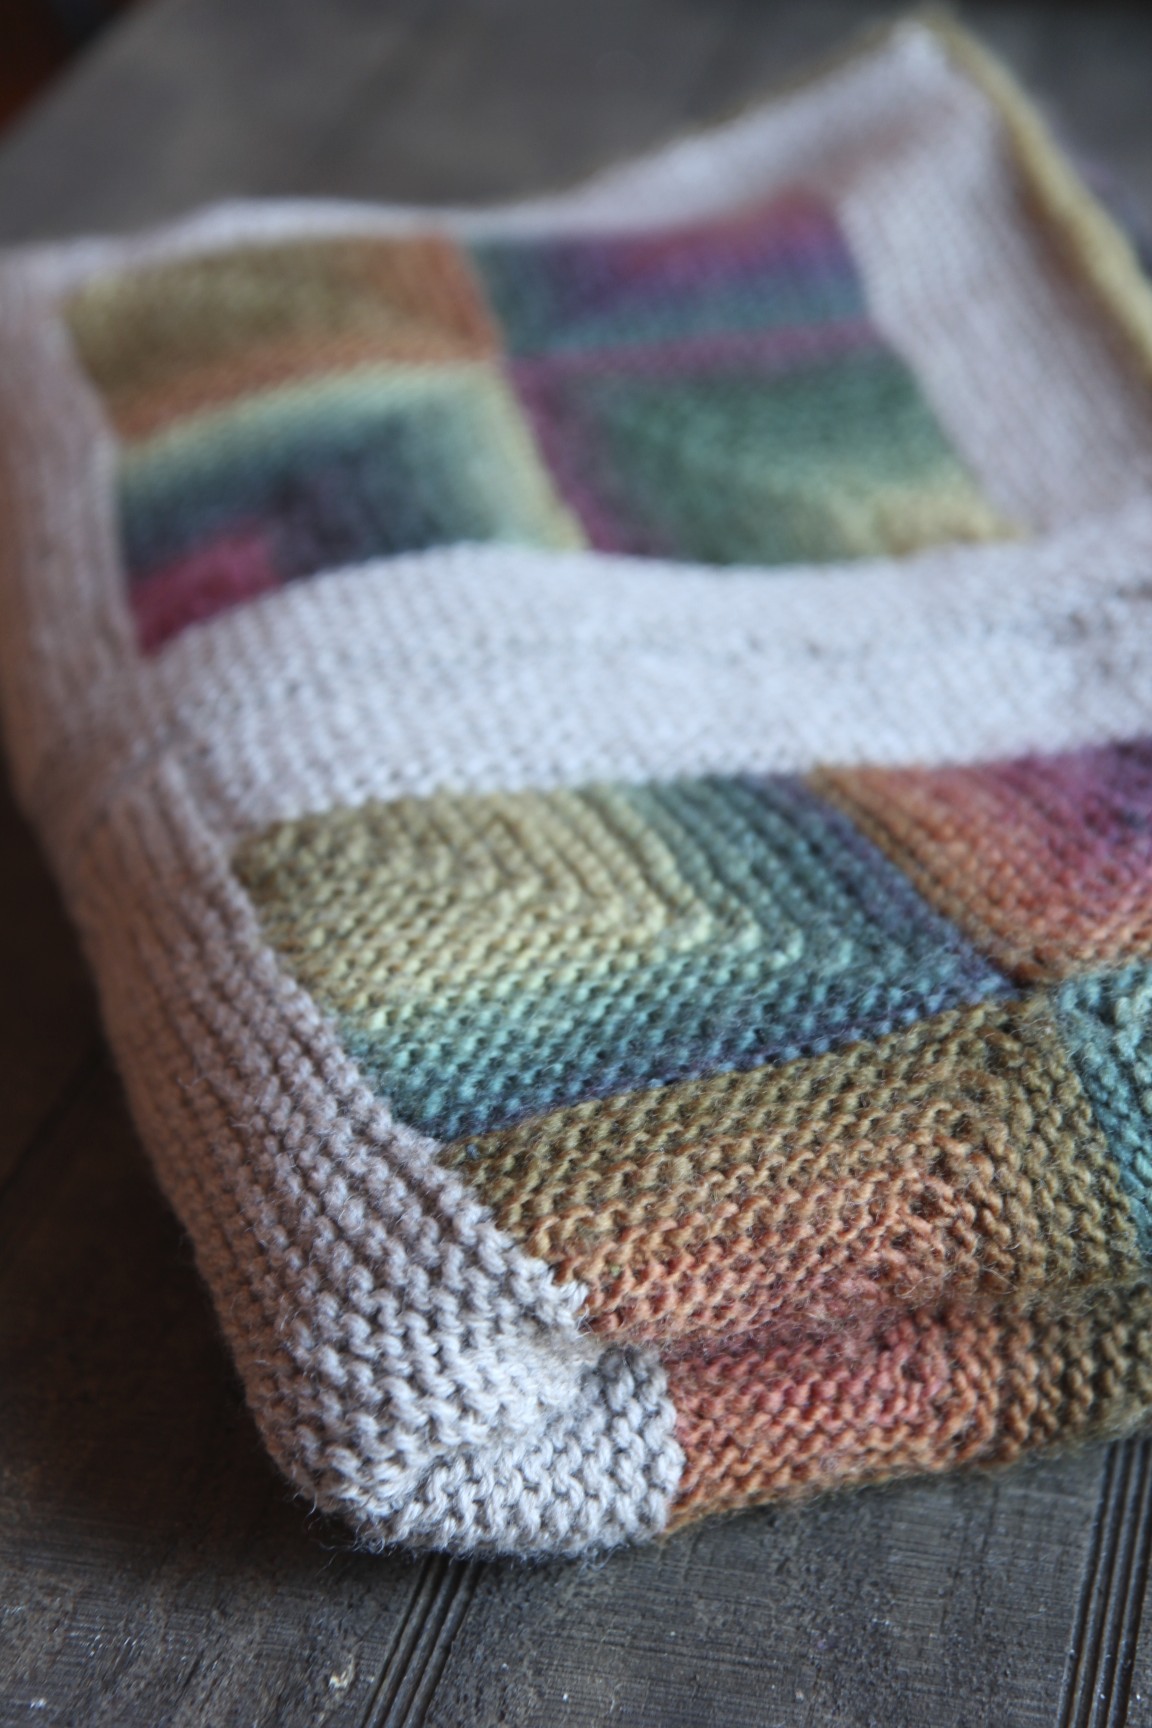
I blocked all the squares first before I sewed them together. And I did sew them together. I did not do the three needle bind off. I just thought that sewing them together would be a lot faster. If you want to do the three needle bind off, be sure to read Kay’s post about how she did it.

The i-cord edging takes a while to do but it is SO worth it. It really finished the throw. I did the edging in the striping color instead of the background color, which the pattern called for, and I really think it adds something. It took me several days to do it, just working a little bit on it every day. Some people are intimidated by the thought of i-cord but it’s so easy. Here is how you do it:

you start out with three stitches on your needle (left). With the left
needle, pick up a stitch (right). Knit that stitch.
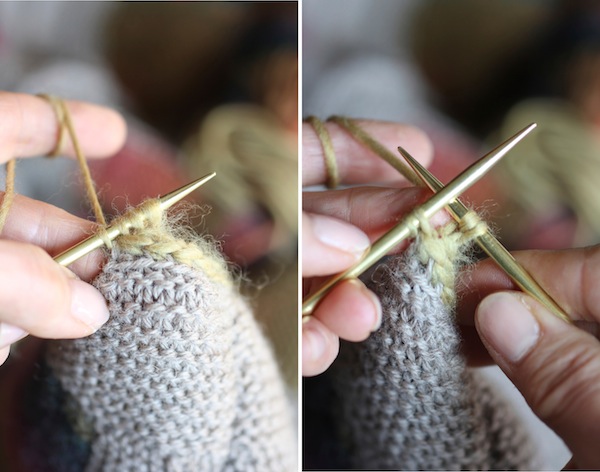
You now have four stitches on your needle. Transfer all those stitches
over to your left needle (left). Knit the first two stitches (right).
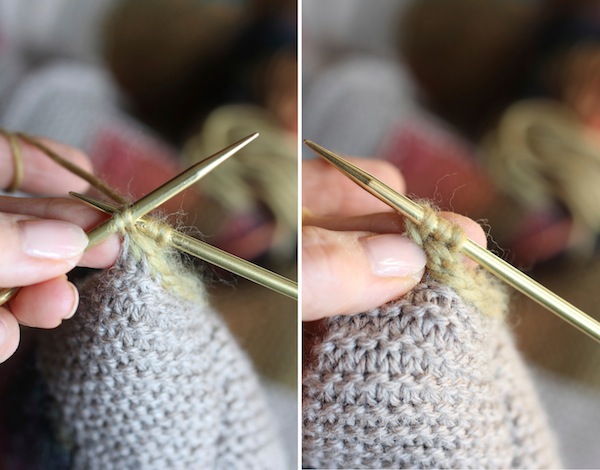
Knit the last two stitches together, through the back loops (left).
Now you have three stitches again. Repeat. Easy!
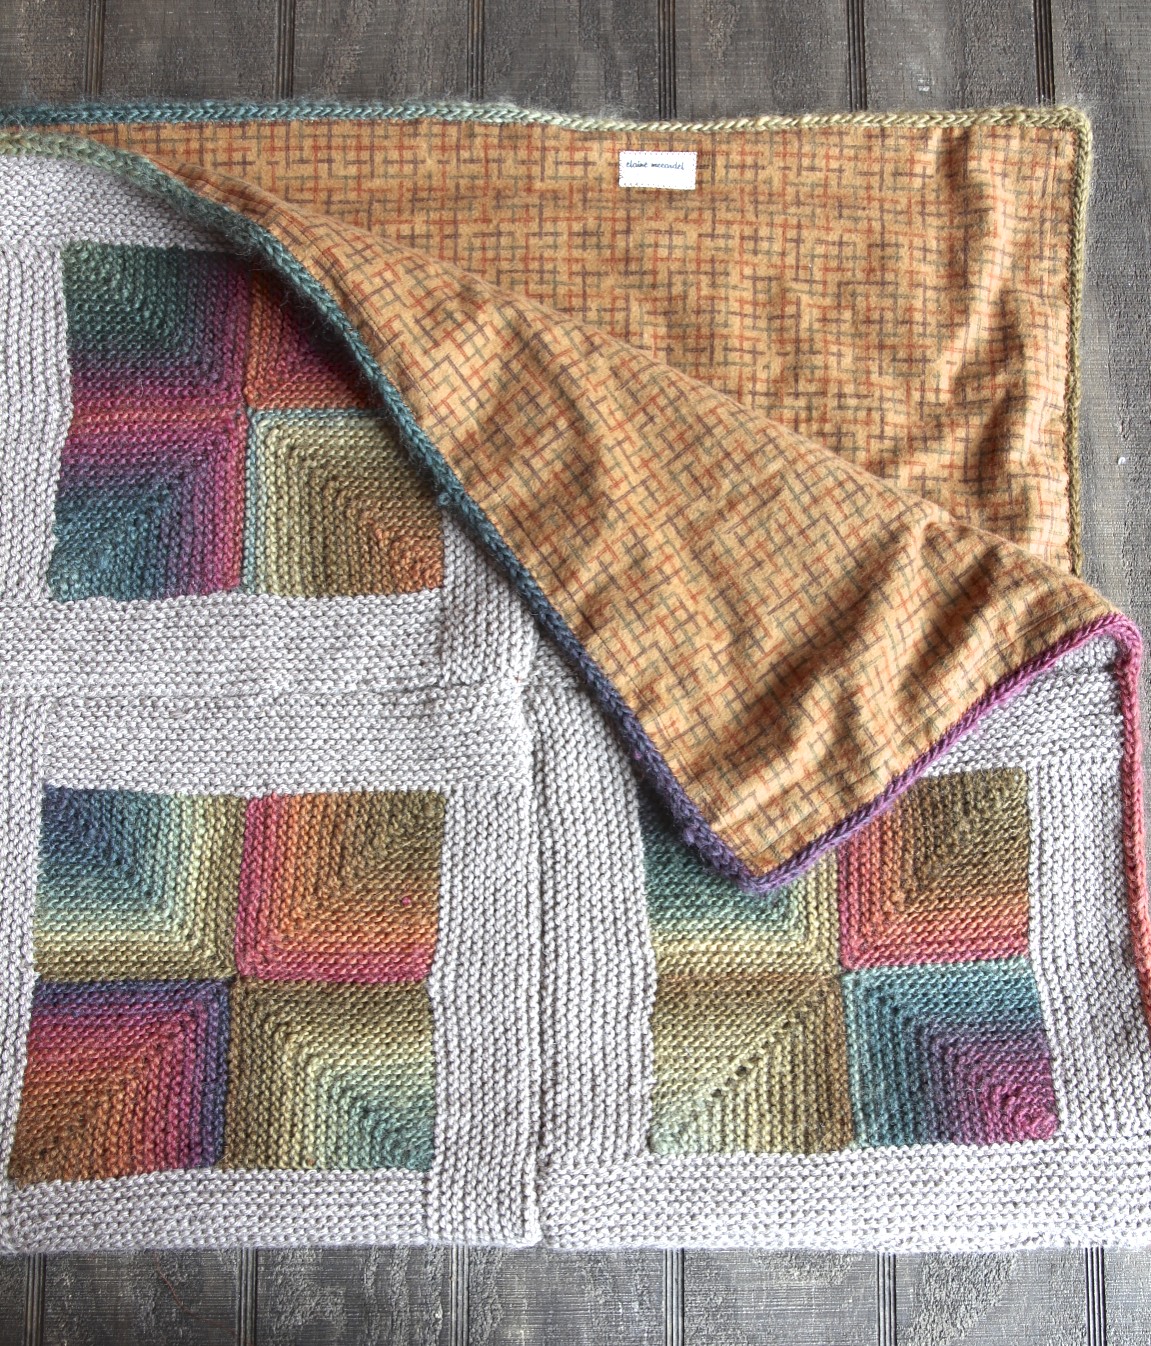
After I finished the edging, I decided the “wrong” side of the throw was so unattractive I wanted to cover it up. Plus, I felt the throw needed a little bit more structure. So I decided to add a flannel fabric lining. I wasn’t sure how to do this – I knew I could cut the fabric, hem it on my sewing machine just fine but then I wasn’t sure how to attach it. This post from TECHKnitting helped me a lot. It’s about how to use an overcast stitch by hand so that the stitch gives a little, which is required because of the stretchy nature of the knitting.

the overcast stitching shows but it is still
preferable to doing a blind stitch because
it gives ease to the knitting

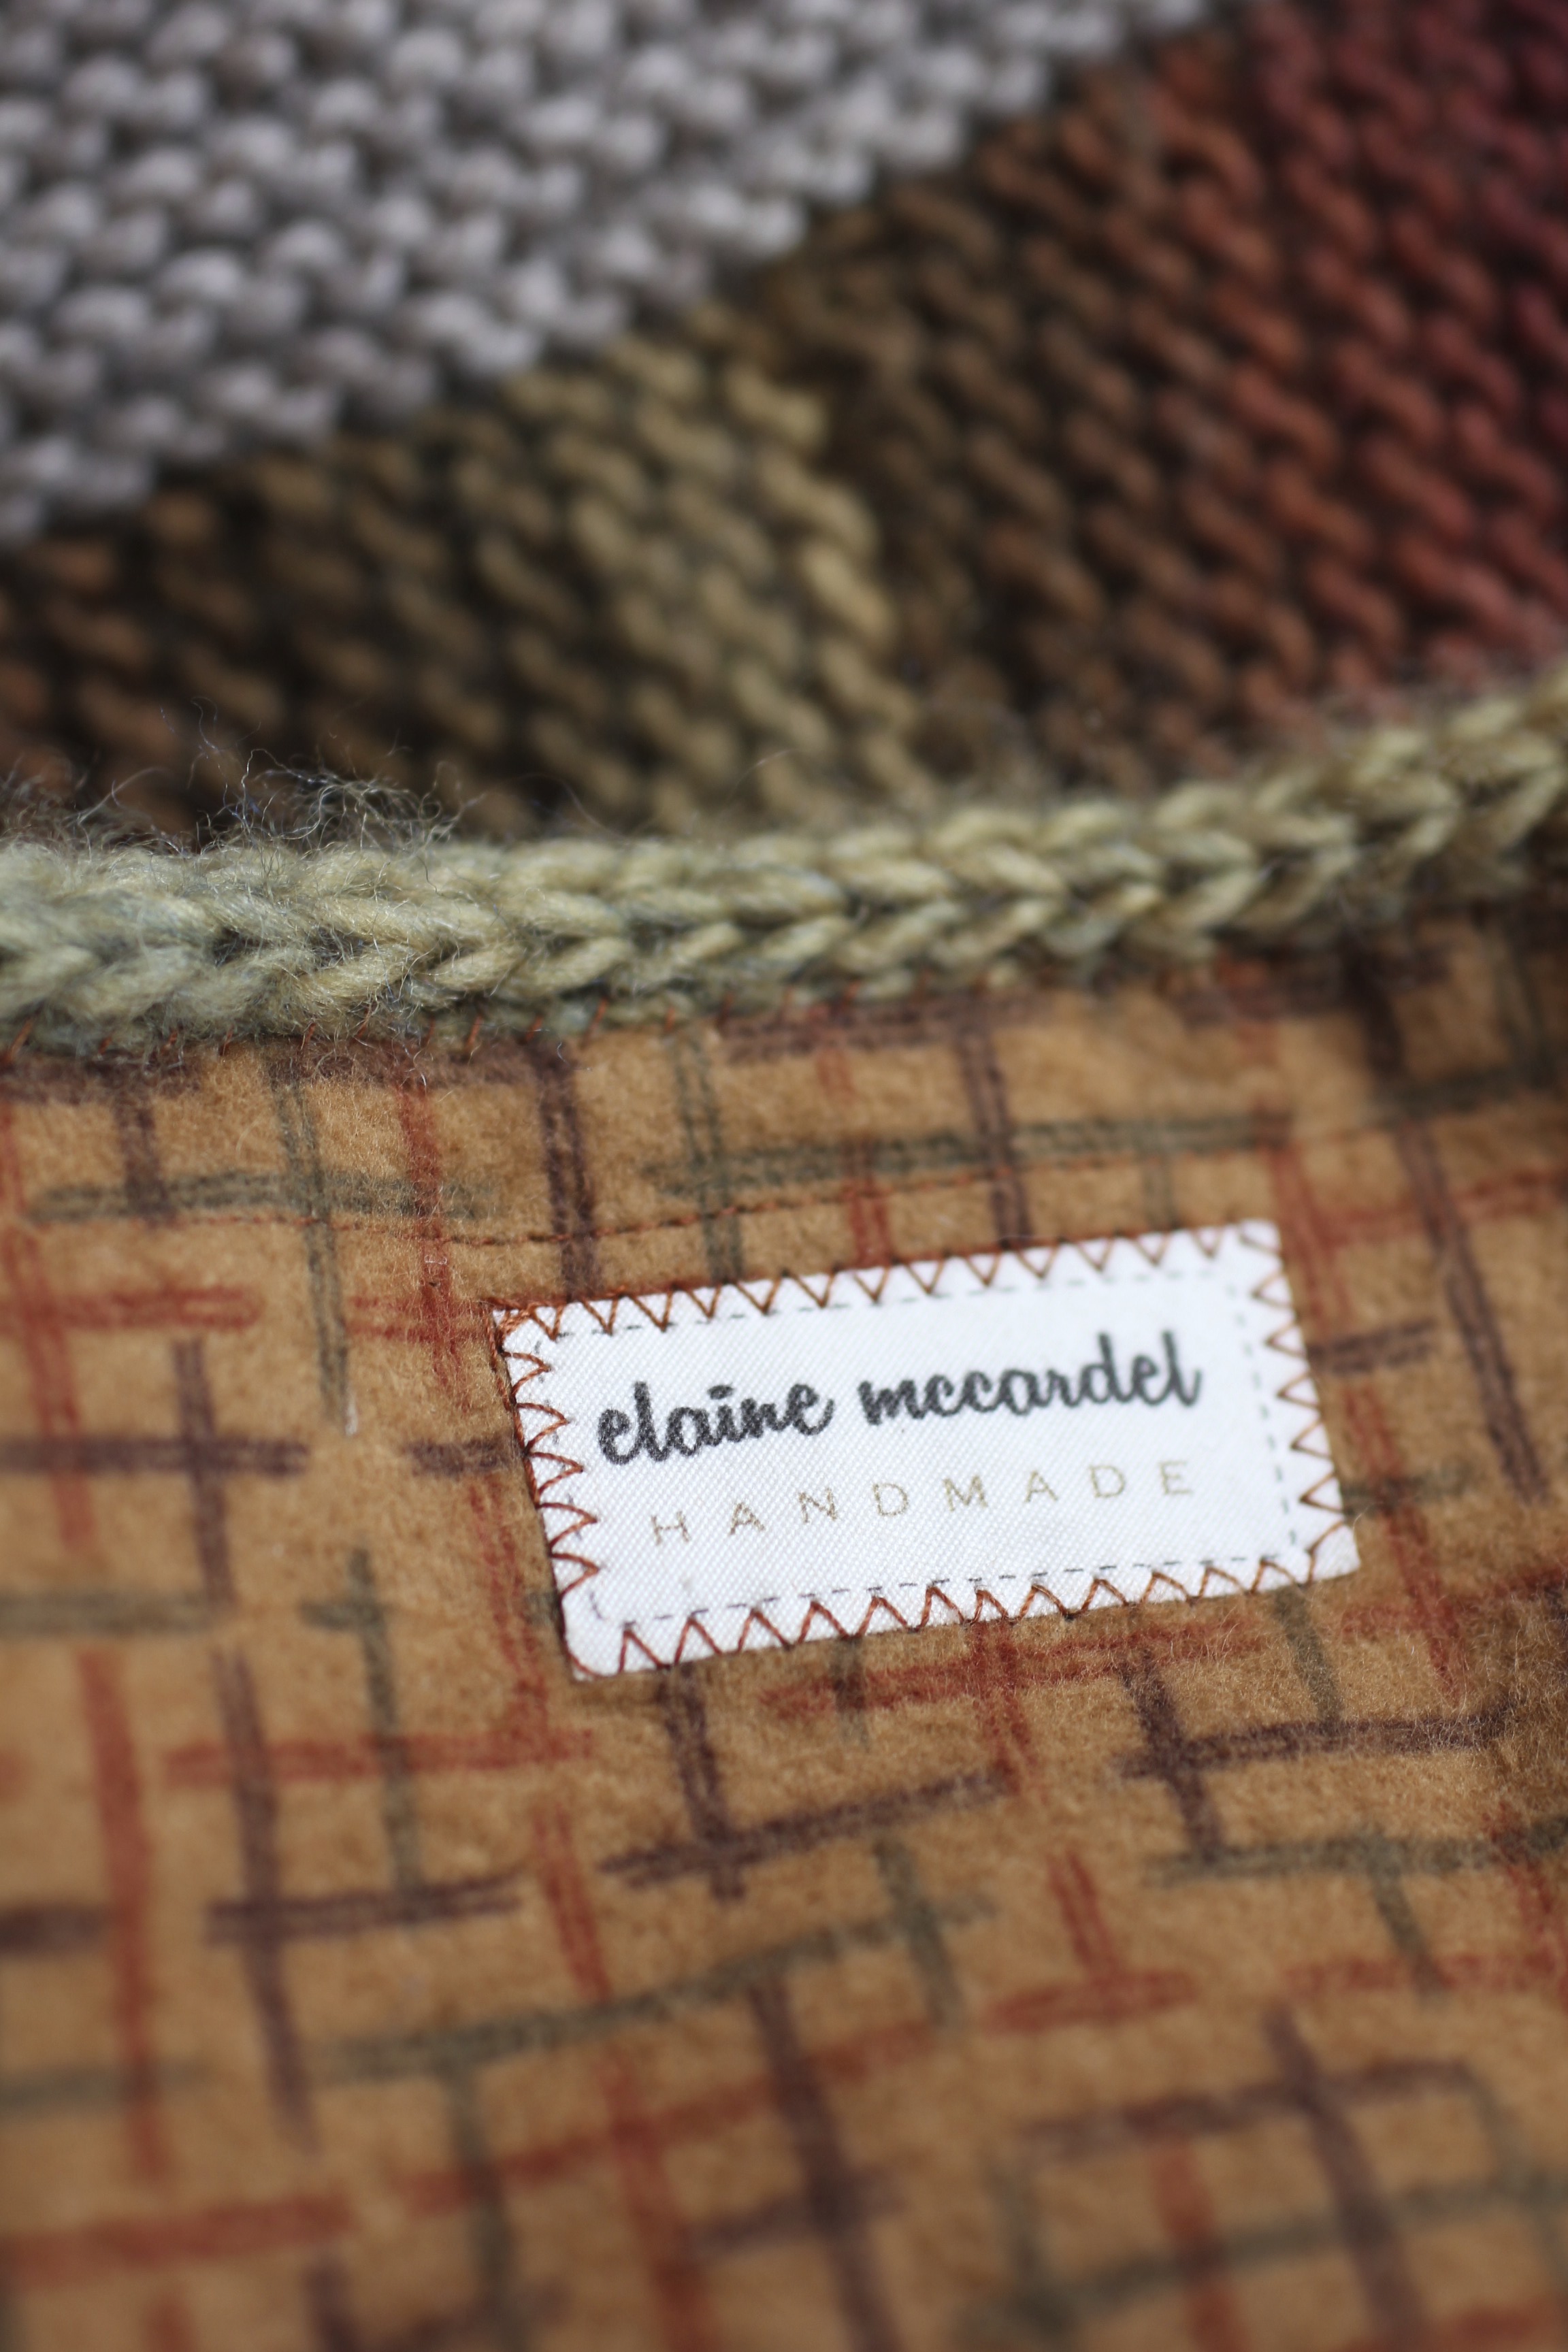
name labels from
Ananemone Etsy shop
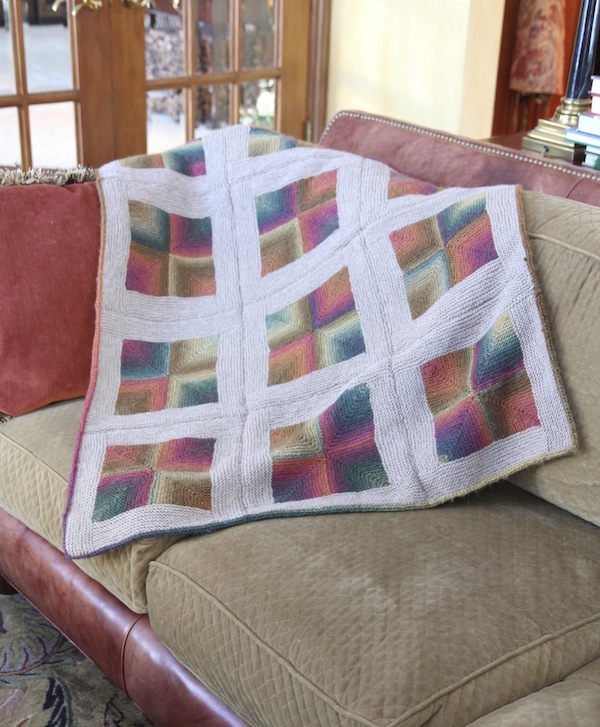
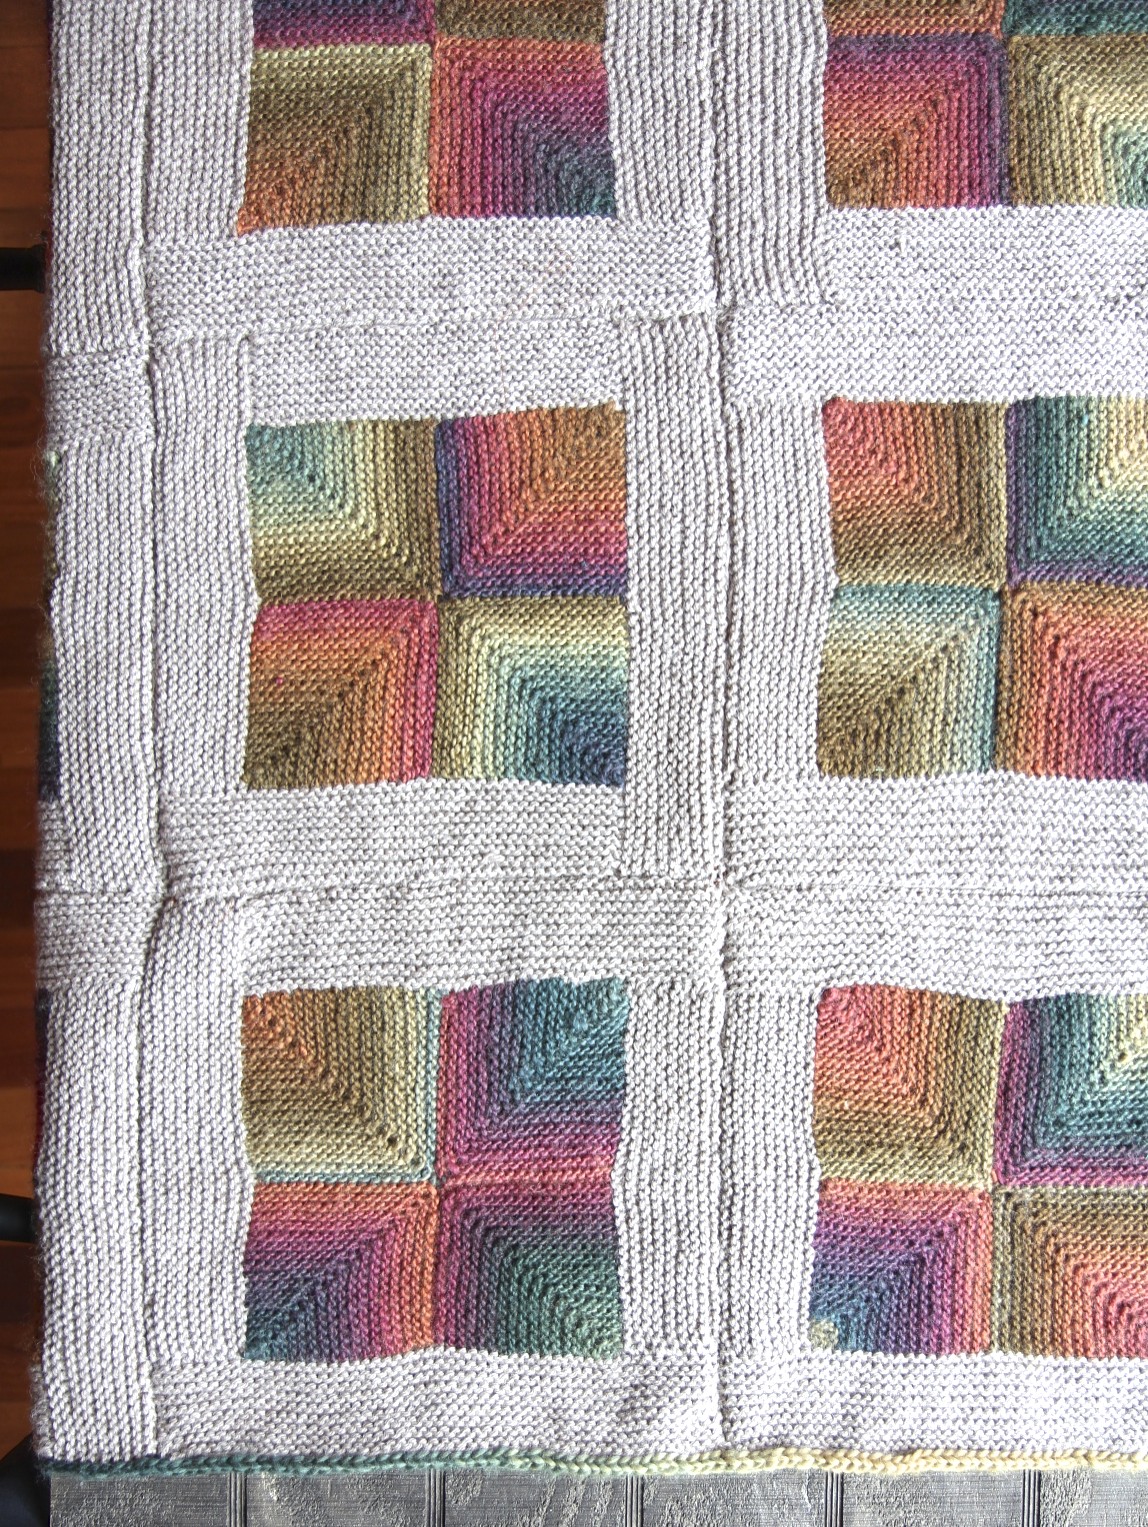
The finished blanket is about 44″ x 33″. Each block is about 11″ square. I did 12 blocks so it’s not a huge blanket, but rather just a nice throw to put over your lap. Between the 100% wool yarn and the flannel, it’s pretty toasty.
Pattern: Mitered Crosses Blanket
Yarn: Crystal Palace Mochi Plus in Autumn Rainbow
Cascade Yarns 220 Heathers in Doeskin Heather
Needle: #6 Circular Addi Lace
Ravelry Page


Thank you for this informative post. I hope the yarn doesn’t felt on you. Then again, it may add a lovely dimension.
This is so beautiful Elaine. You are an inspiration. I bet you are using this blanket a lot right now to stay a bit warmer.
Beautiful! I knitted a log cabin baby blanket a few months ago and backed it with fabric, also. Now, I must do one of these! Thanks for the gorgeous inspiration. My blanket is on ravelry. My user name is sadie21jean, if you would like to take a look.
Une splendeur ! Ouvrage magnifique. Bravo !
I really love this blanket and would like to give it a try. How did you adapt the pattern in order to do the squares? And how many skeins of each wool did you use? Sorry but for some reason I was unable to find that information. Thanks a lot in advance for your help!
Natalie: It’s really easy to make the squares instead of the crosses, because the crosses require a color change. For the squares, just don’t do the color change. Once you see the pattern, it’s really obvious how to do it and easy. As for the number of skeins I used, I don’t think I kept track! I wasn’t sure how big of a blanket I wanted when I started, so I just kept buying more yarn and stopped when I got the blanket to the size I wanted. Sorry I can’t help with that!
Thank you so much! That already helps a lot!
How big were your mitered squares? I’m considering something like this and I want to make sure I ordered enough yarn for it. haha
It’s in the post – they are about 11″ square. Hope this helps! It’s a really fun pattern.
Wat een mooie wol, en een leuk patroon. Dank je welletjes hoor. Els
heel mooi hoor, ik deed weer eens wat verkeerd (LOL) dus op nieuw proberen. De wol is ook heel mooi. Doei Els
Impressive work ! I admire your patience !
it is a beautiful blanket ! 🙂
A beautiful neat piece of work!!!!!! Thank you for sharing and you’ve just taught me how to make the icord which does give a neat finish and as you said it’s is sooo easy!
Phyllicia: Yes, it’s easy and I hope my photos help you to do it!
Ca you send me the pattern for the mitered squares, please
Jenny: There is a link to the pattern in the first paragraph of the post and also at the very end of the post.
Thank you….does the link tell you how to join the background color to the squares as well?
Thanks in advance….!
Hi Jennifer: In the post, there is a photo of my sewing the squares together and I talk about that a little bit in the post. If you look closely at the photo, you can kind of see what I did. I really just did a simple stitch to join them together.
I would love to knit this and have been blessed with so much noro silk to do so.
What is the stitch count for each mitred block pls.
Melinda
Melinda: It is in Kay Gardiner’s pattern. The link to the pattern is in the blog post.
while this is a pretty pattern I am not going to pay 7.50 for it.
I’m very impressed. I need to go to Crystal Palace or Knit Picks & start one of these! Jennifer/goatberryfarm on Ravelry
I am going to try this blanket. Can you please explain how you knitted the background color? I bought the pattern from ravelry but it’s way to complicated. She hank you so much for your help.
Mariza: The background is knitted just in a simple garter stitch – knit every row. Can you tell me what about the pattern you are finding confusing? I will try to help!
Do I pick up stitches? How many left and right of the 4 squares? Sorry to bother you! I love your blanket and boughtvthe yarns already.
Mariza: Look over the pattern – where it says “Log Cabin Frame” are the instructions for the background knitting. It shows a diagram of the mitered squares and tells you what side and how many stitches to pick up. It tells you specifically how many each side to pick up.
I’m so seeing how you did the corners in the I-cord binding. I love the blanket you made. The binding is the perfect touch.
Wow! Just beautiful!! You’ve inspired me to make this!!
Thanks for this! been looking for something like this to help me out!
Thanks for sharing! Beautiful!
What type of sewing thread did you use?
Have liked the mitered look but never tried. I think I’m finally realizing that I’m not so much into the actual making as to just enjoy and have – just in case.
Thank you!
where can I find the pattern to make these squares?
The link to the pattern is right in the post. First paragraph.