h1

Turkish Bed Socks

September 8, 2014

IMG_6621

Here’s a fun little project I recently finished.  These little socks are super easy to make and make great use of all that sock yarn laying around. I guess a lot of people like to wear them with clogs, but I made mine just for something comfy to wear around the house.  The pattern is from Churchmouse Yarns and Teas shop on Bainbridge Island.  If you’re ever in the Seattle area, it’s a great little shop to visit. And they have a lot of terrific patterns on their website.


IMG_6247

IMG_6262 IMG_6280 IMG_6611


I made little tassels to go onto mine and I really like the look.  The yarn I used is from Pagewood Farm – it’s hand dyed, super soft 80% merino, 20% nylon. The color is Lavender Fields. I used #3 circular needles and this made a perfect size for my foot, which is an 8-1/2.  I loved the pattern because there was hardly any purling and I could just go round and round on my circulars using Magic Loop.  These knit up really fast and I’m definitely going to make another pair in a different color.

IMG_6637


Pattern: Turkish Bed Socks
Yarn:  Pagewood Farms Sock yarn in Lavender Fields
Needle: US 3 Addi Lace Circulars
Ravelry Page

h1

Mitered Squares Throw With a Fabric Lining

March 3, 2014

miteredsquaresopen

This is one of my favorite projects ever.  This pattern has been around for a while and I was late to the game on it.  It is the Mitered Crosses Blanket that Kay Gardiner made for Japan tsunami relief a couple of years ago.  There are over 900 project pages for it on Ravelry.  I loved this pattern so much and really loved making it.  One of the best things about this pattern is that the project, up until the time that you assemble all the blocks, is very portable.  I took these squares everywhere with we while I worked on them.

instagramshot

closeupmiteredsquares

I changed quite a few things from the original pattern, though. The original called for mitered crosses, of course.  I decided I didn’t want to do the crosses and did squares instead.  I really like the way they turned out. The squares are super easy to make and after a short time, you don’t even need the pattern.  There’s no counting of rows – yay! – you just have to remember to do the decreases on the right side and none on the wrong side. Just make sure you have a stitch marker to mark your corner, where you do your decreases.

mochiplus

I also did not use Noro Silk Garden for two reasons:  I feel it’s a little scratchy and it’s very expensive.  So I searched and found a striping yarn that substituted very nicely – Crystal Palace Mochi Plus.  The colors in Mochi Plus were stunning and it was a hard decision on what colorway to use.  I loved Lake Trail and Leaves & Sprouts but eventually settled on Autumn Rainbow because I started this in the fall and the yarn exactly matched the colors I was seeing all around me.  The  yarn stripes slowly, which I really liked for this.  It is a one-ply yarn so it could be a little felty.  For the background color, I used Cascade Yarns 220 Heathers in Doeskin Heather.

connectingblocks

miteredsquarecloseup

I blocked all the squares first before I sewed them together.  And I did sew them together. I did not do the three needle bind off.  I just thought that sewing them together would be a lot faster.  If you want to do the three needle bind off, be sure to read Kay’s post about how she did it.

icordedging

The i-cord edging takes a while to do but it is SO worth it. It really finished the throw. I did the edging in the striping color instead of the background color, which the pattern called for, and I really think it adds something.  It took me several days to do it, just working a little bit on it every day.  Some people are intimidated by the thought of i-cord but it’s so easy.  Here is how you do it:

icordone

you start out with three stitches on your needle (left).  With the left
needle, pick up a stitch (right). Knit that stitch.

icordtwo

You now have four stitches on your needle.  Transfer all those stitches
over to your left needle (left).  Knit the first two stitches (right).

icordthree

Knit the last two stitches together, through the back loops (left).
Now you have three stitches again.  Repeat.  Easy!

After I finished the edging, I decided the “wrong” side of the throw was so unattractive I wanted to cover it up.  Plus, I  felt the throw needed a little bit more structure.  So I decided to add a flannel fabric lining.  I wasn’t sure how to do this – I knew I could cut the fabric, hem it on my sewing machine just fine but then I wasn’t sure how to attach it.  This post from TECHKnitting helped me a lot.  It’s about how to use an overcast stitch by hand so that the stitch gives a little, which is required because of the stretchy nature of the knitting.

overcaststitchcloseup

the overcast stitching shows but it is still
preferable to doing a blind stitch because

it gives ease to the knitting

overcaststitch

throwflap

namelabel

name labels from  
  Ananemone Etsy shop 

throwonsofa

The finished blanket is about 44″ x 33″.  Each block is about 11″ square. I did 12 blocks so it’s not a huge blanket, but rather just a nice throw to put over your lap. Between the 100% wool yarn and the flannel, it’s pretty toasty.

Pattern:  Mitered Crosses Blanket
Yarn: Crystal Palace Mochi Plus in Autumn Rainbow
Cascade Yarns 220 Heathers in Doeskin Heather
Needle:  #6 Circular Addi Lace
Ravelry Page

h1

Crochet Squares Throw

January 21, 2014

IMG_3717

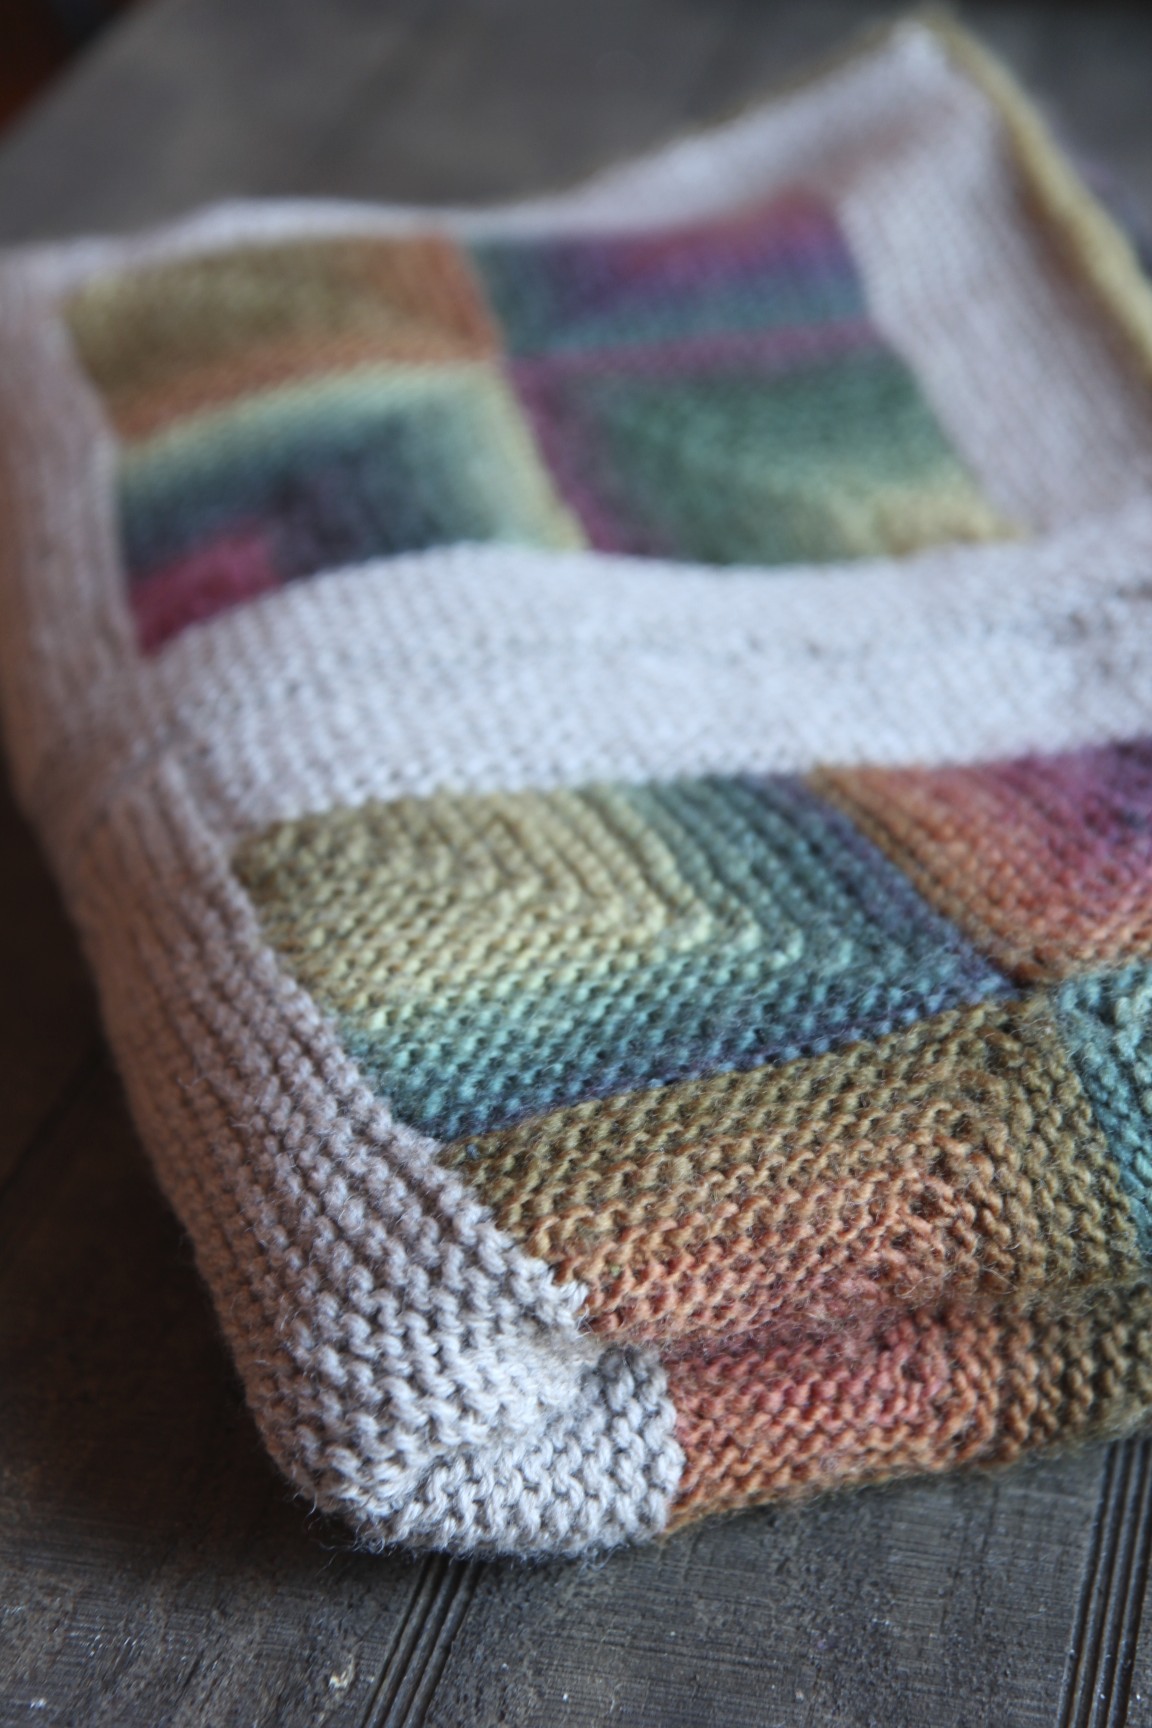
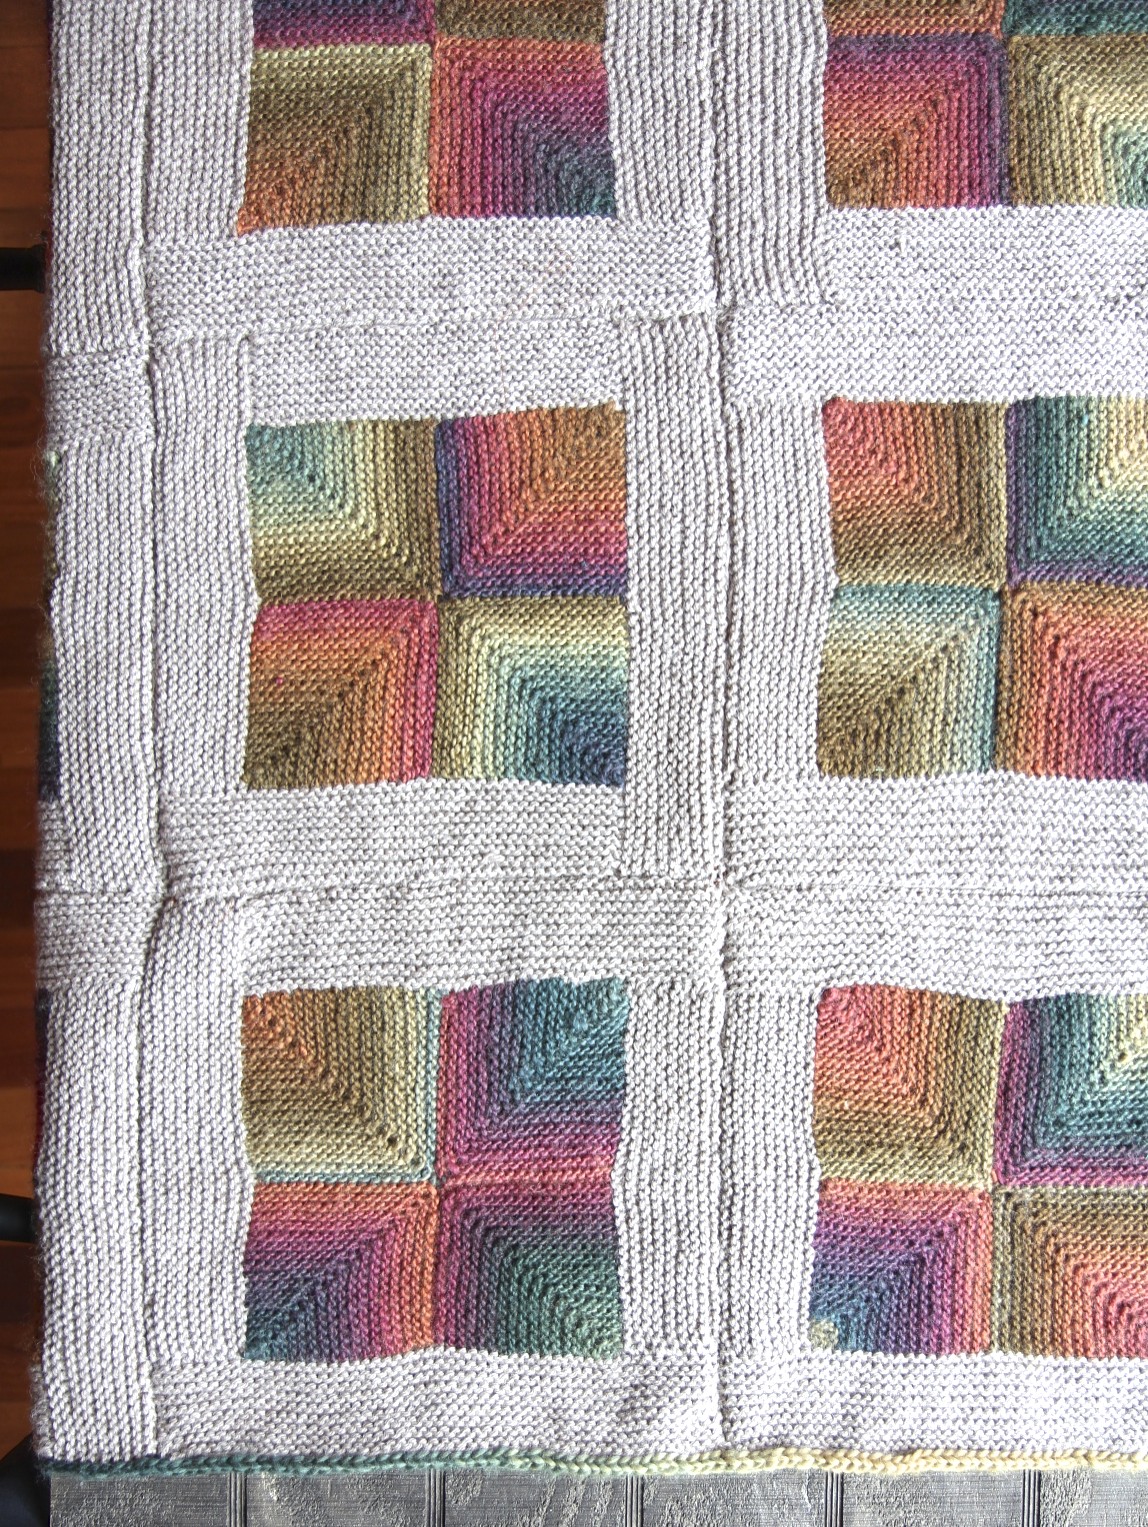
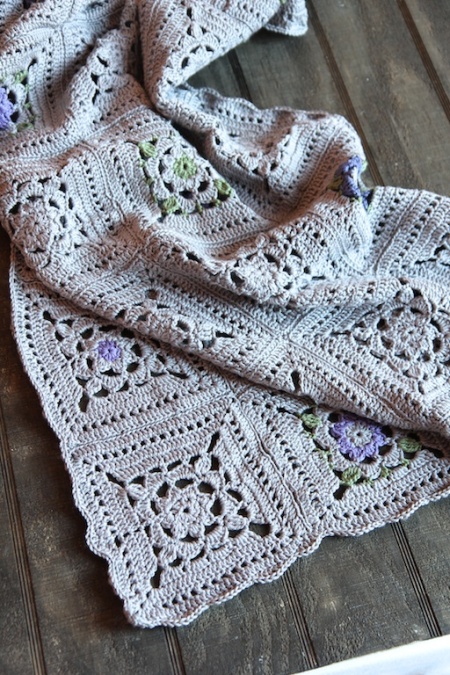
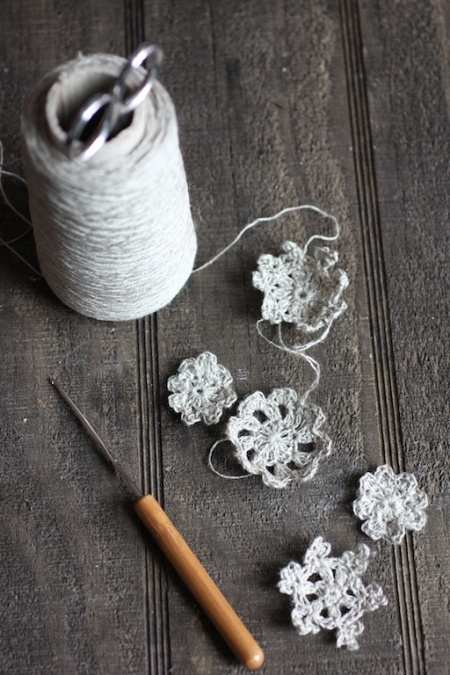
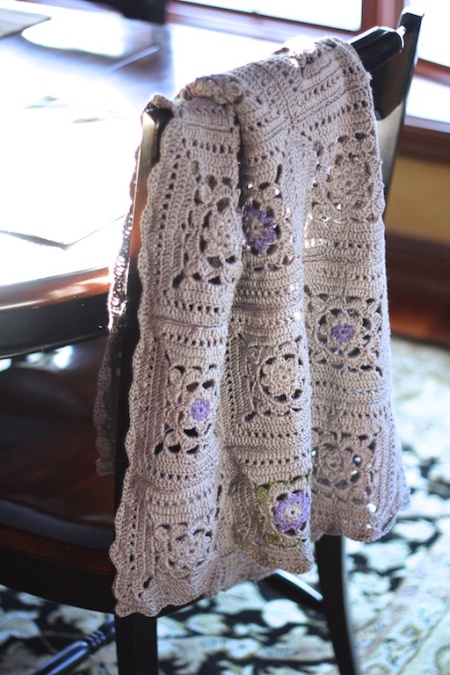
Well I finally got my grey crochet throw finished and I’ve written up the pattern for the square.  I had to teach myself crochet to do it, but I’m glad I did because I am a crochet fan now and have been crocheting lots of little other things, too:

IMG_3683

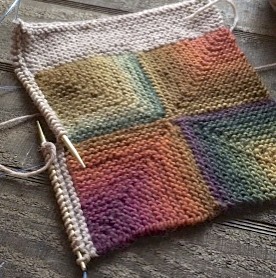
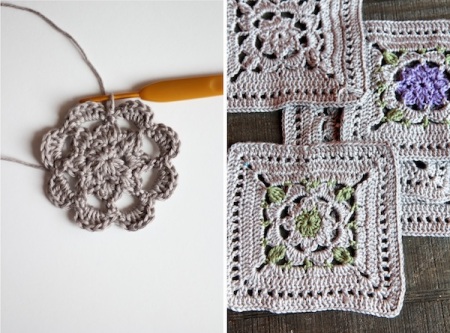
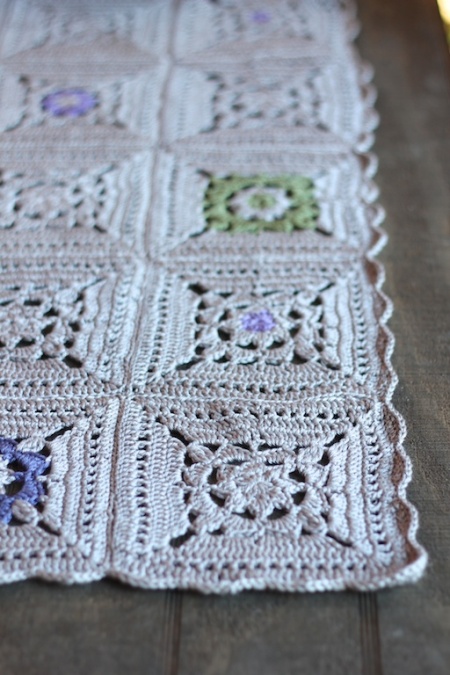
I crocheted 30 squares in all and then just crocheted them together, using a single crochet stitch.  I put a touch of purple and green here and there, but overall the color is gray which I love.

Untitledcrochet

I have gone over the pattern with a fine tooth comb so that it reads correctly.  Since I am a novice crocheter, I hope the pattern reads okay for you guys.  Let me know if there are any problems with it.

IMG_3743

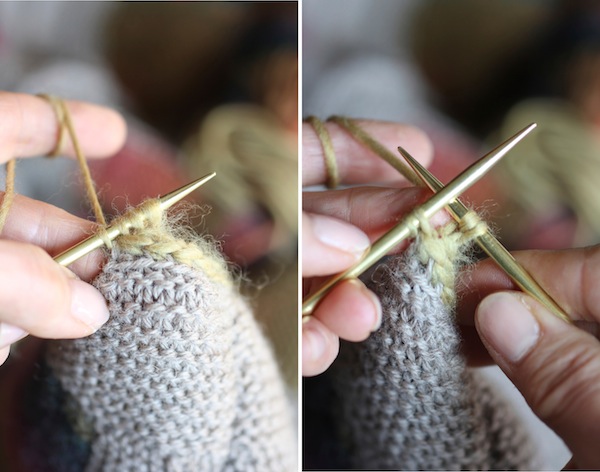
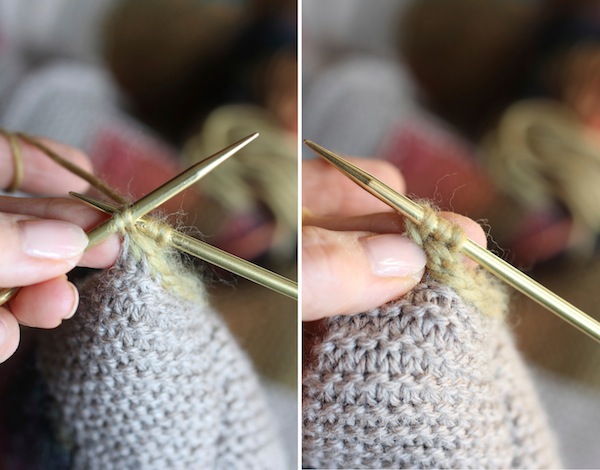
The “Leaf” Row is probably the hardest row to get down but once you do it a few times I swear you don’t even need the pattern anymore for that row.  The “yarn overs” in that row are very fun to do, I think.  And it zips right along.

IMG_3704 (1)

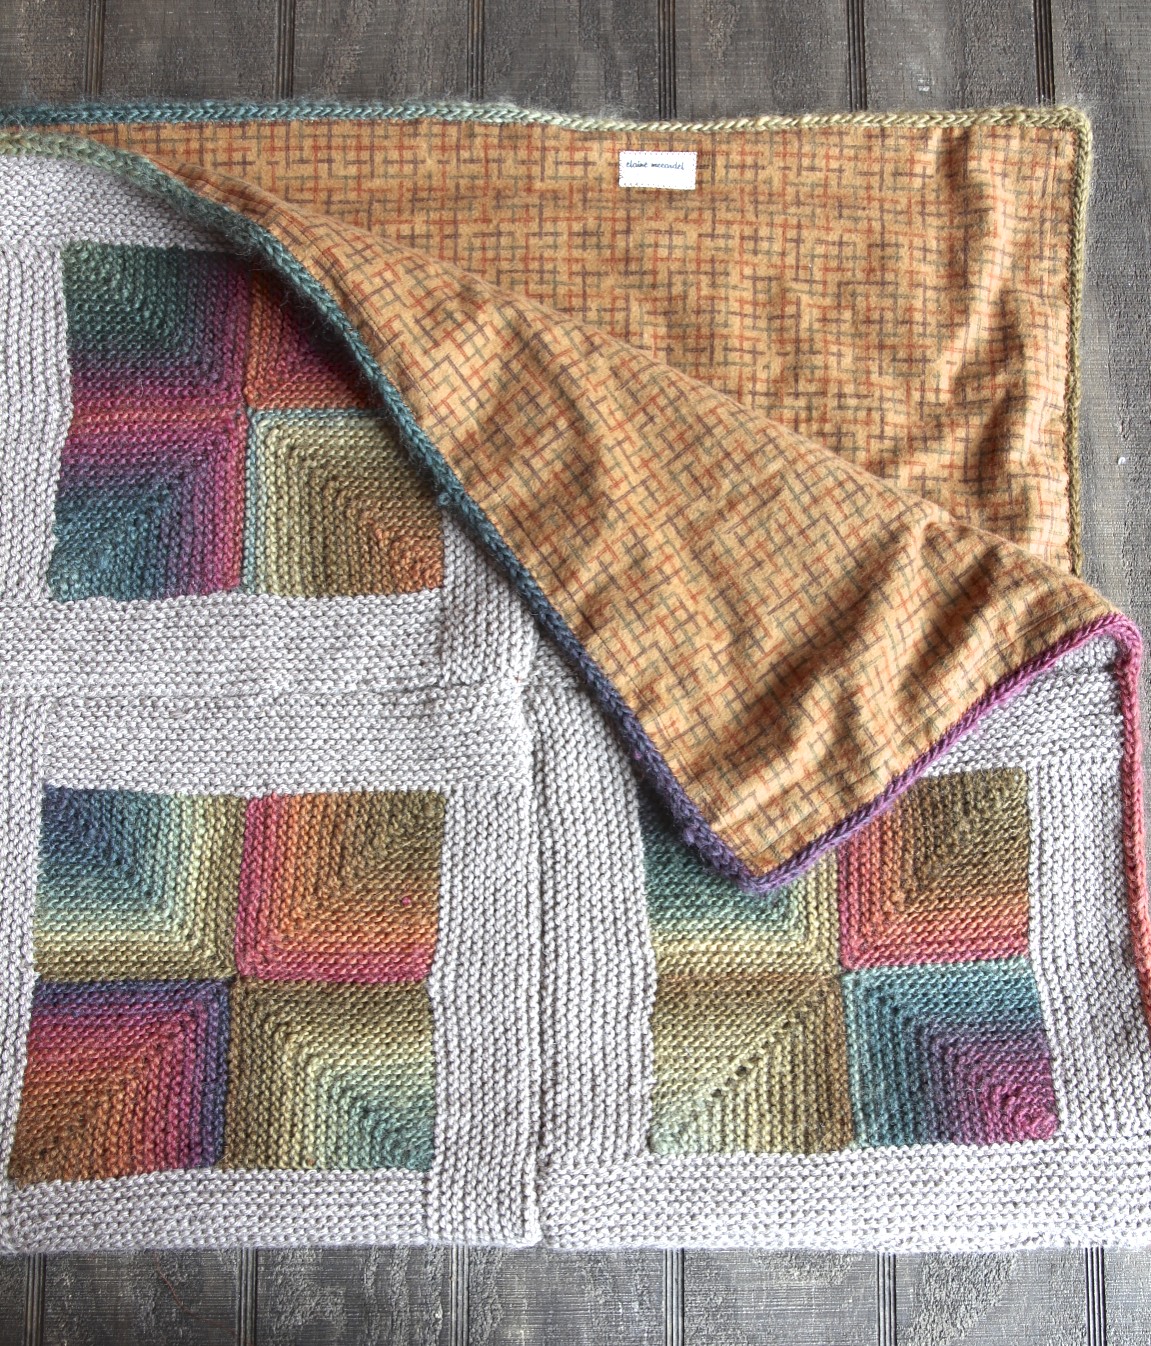
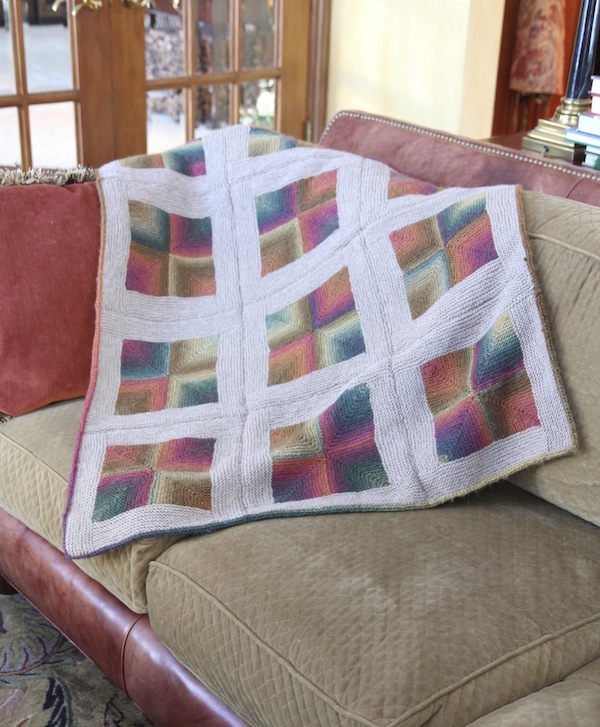
The yarn I used produced the specific drape that I wanted in this throw.  For the first time, I didn’t use wool and it was very different.  The cotton was stiffer to work with but created a more defined stitch than most wools would.  It was a beautiful yarn from Cascade – Ultra Pima. The main color was the Taupe – go to my Ravelry page to see details.

crochetsquaresone

crochetsquarestwo

ELAINE’S CROCHET SQUARE:

for a printable version of this pattern click here

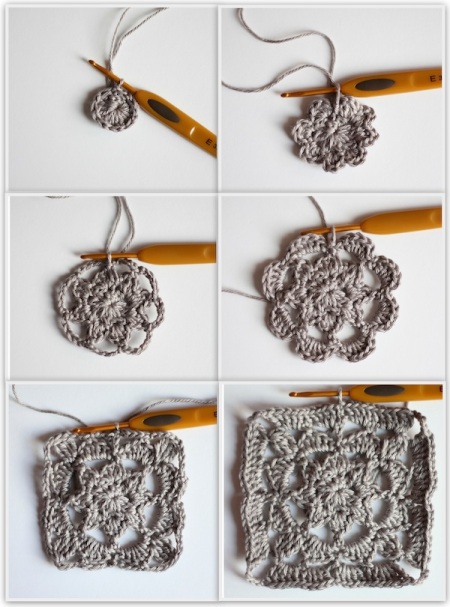
each square is 9 rows

(stars are repeats)

ch 5, join into ring or do Magic Ring

Row 1: Chain 2 (counts as 1 partial dc), 1 partial dc, yo and through the 2 loops, ch1. *Work 2 partial dc & then yo and through all 3 loops, ch1* 7 more times.   8 clusters total.

Row 2:  sl st to 2nd chain,  ch 1.   *1sc, 3 dc, 1 sc  in next chain loop space*.  Repeat in each ch loop around.  8 total.

Row 3:  sl st between two petals, ch 1, 1 sc in center of petal, ch 5.   *1 sc in center of next petal, ch 5.*  Repeat. 8 total. sl st to beginning ch 1.

Row 4:  * 1 sc, 5 dc, 1 sc  in the ch5  loop space *   repeat in each ch5 loop space around – 8 total.  Sl st at the beginning of the next petal

Row 5: (leaf row):  ch 1 (=1 hdc)  *ch 4, 1 sc in center of petal, ch 3.

Make  Leaf: yo twice, hook into last sc of petal, yo = 4 loops on hook.
yo and through 2 loops 2 times – 2 loops remain.
yo twice and insert hook into same sc of the petal work, yo = 5 loops on hook
yo and through 2 loops 2 times  = 3 loops remain
yo twice and insert hook into first sc of next petal, yo = 6 loops on hook.
yo and through 2 loops 2 times = 4 loops remain
yo twice and insert hook into same sc, yo = 7 loops on hook
yo and through 2 loops 2 times = 5 loops on hook
yo and through all 5 loops, (this completes 1 leaf)

ch 4,1 sc in center of dc of next petal, ch 4, 1 hdc between next 2 petals

Repeat from * 3 more times

ch 4, ending last repeat with sl st to 2nd ch at beg in rnd instead of 1 hdc.

Row 6: ch 3 (counts as 1 dc),   *4 dc in the ch 4 loop, 1 dc in the hdc.
make corner:  3 dc, , 2 tr, ch 4, 2 tr, 3 dc, 1 dc in the hdc*  repeat all the way around, ending with a 4dc and a sl st to 2nd ch at beg of round

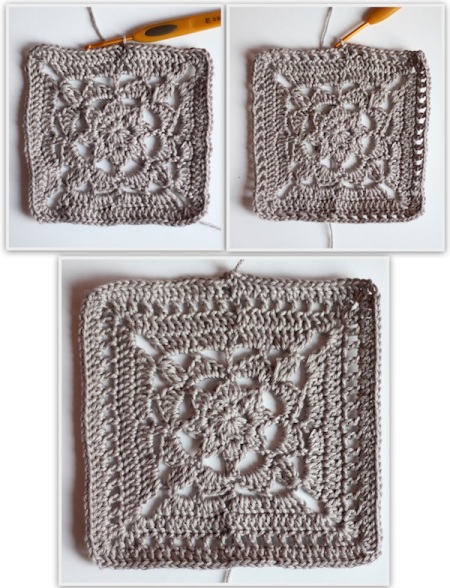
Row 7:  ch 3 (counts as 1dc), dc in each stitch all the way around. When you come to a corner: 3 dc, ch2, 3 dc in the ch 4 space makes a corner.

sl st to 2nd ch at beg of round

Row 8:  (skip space row) ch 4 (counts as a dc) ,* sk next dc, dc in next dc, ch1  all the way across. Make  corner:  2 dc, ch 2, 2 dc in corner ch 2 space.    Repeat all the way around.

sl st to 2nd ch at beg of round

Row 9:  ch 3 (counts as 1 dc), dc in every ch 1 sp and every dc across.  Corner:  2 dc, ch 2, 2 dc

I made 30 squares and crocheted them together, just using single crochet.

For the edging, I did a series of 9 stitches all the way across, making little arches, working one stitch in every stitch on the throw:  1 sc, 2 dc, 1 tr, 2 dc, 1 sc, 2 ss.   I just repeated that little arch all the way around.
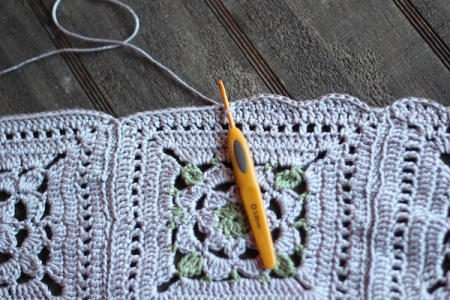
IMG_3693

adding the edging

IMG_3739

IMG_3746

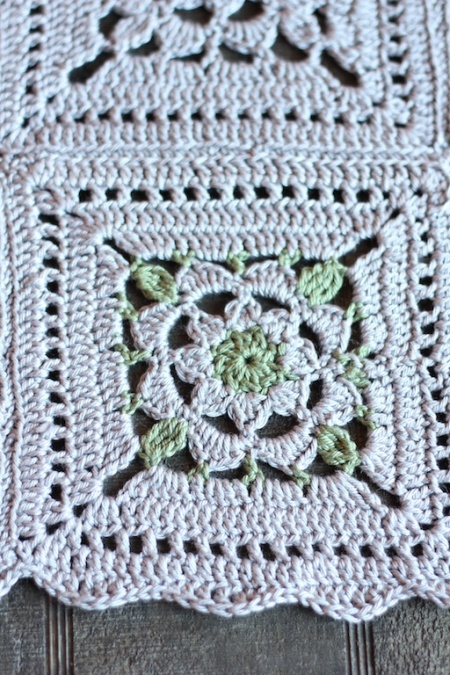
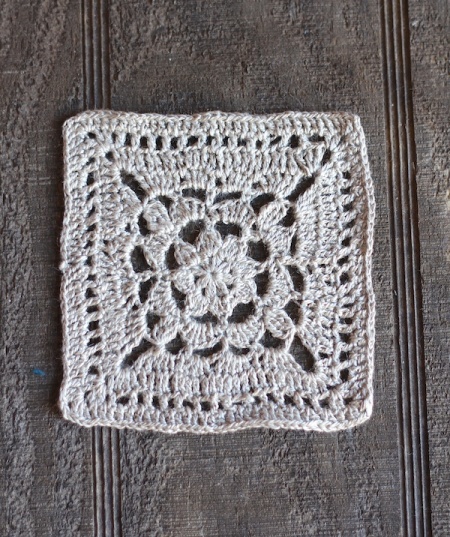
Here is the same square crocheted up in some fine linen thread that I’ve been experimenting with on a tiny crochet hook – so fun!

Crochet Squares Throw
Hook:  3.5  mm (E)
Yarn:  Cascade Ultra Pima
Ravelry Page

h1

Yvonne’s Purple Knit Stars

January 15, 2014

Image

I made some of these these knitted stars last year and loved them so much that I made more last month for my friend who loves the color purple.   Her colors in her house are beautiful plums and ivories, so that’s what I made for her.

IMG_3494

This is an easy pattern and fun to make.  It only takes about an hour and a half to do one star.  I used various sized needles to get various sized stars.  You can stuff the yarns just with the weaved in ends or, for a puffier look, with some polyfill.

IMG_3531

The yarn I used was Stonehedge, which is a great soft yarn made right here in Michigan.  I love it and it comes in lots of colors.  I crocheted a little hanging loop on each star and slipped a white satin ribbon through each one so they could be hung.  These would also be pretty, though, without the hangers and just thrown in a bowl on the table.

IMG_3506

Pattern: Knit Stars
Needle: various for various sizes
Yarn: Shepherd’s Wool
Ravelry Page